Red Pitaya STEMlab MCP: Giving an AI Agent Control of the Verification Bench
If you didn’t notice, AI is here, and although it is not taking your job for now, it can make it easiest. In my earlier article on remote FPGA verification I used a STEMlab 125-14 PRO Gen 2 as a signal generator, and I wrote every SCPI command (with the help of AI), every UART frame, and every line of the Python script that tied it all together. It worked well, but I did all the work: I designed the test, I wrote the driver, I decided what “pass” meant. We are well into the AI-agent era now, and an obvious question followed me since I published that post: how much of that plumbing can I actually hand off to an agent, instead of writing it myself?
The answer is not “all of it”, and that is exactly what makes this project worth writing about. In this article I build an MCP server that exposes a Red Pitaya STEMlab Pro Gen 2 as a set of tools an AI agent can call directly — connect, configure the generator, acquire a trace — and I use it together with the biquad2rtl MCP to have the agent generate and wire up a bandpass filter on a Digilent USB104 A7, build it on a remote Vivado server, flash it, and drive the STEMlab to test it, and I have to say that it gets remarkably far on its own.
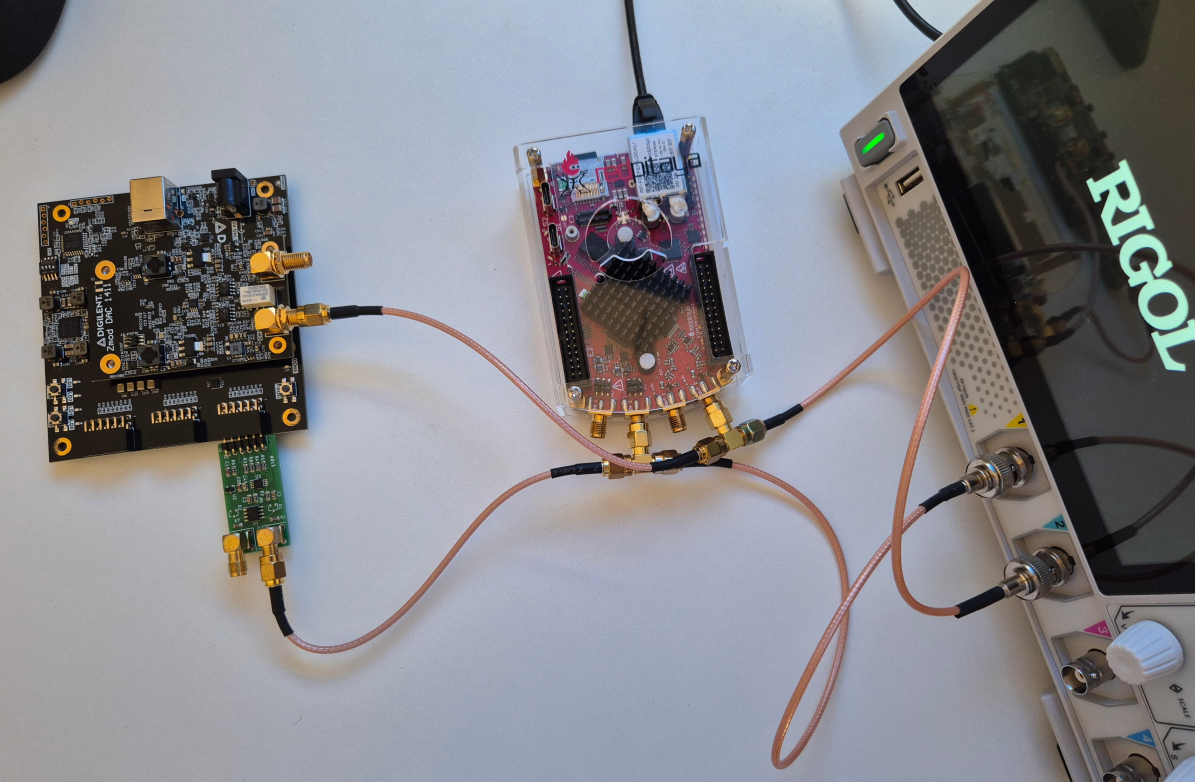
Table of contents
- Why give an AI agent hands
- The redpitaya MCP server
- The test bench: ADC, biquad filter, and DAC
- Building the RTL
- Building and flashing remotely
- Bring-up: what the agent got right, and what it couldn’t see
- Conclusions
Why give an AI agent hands
SCPI is just a text protocol. Every instrument that speaks it is, at its core, a socket that accepts ASCII commands and returns ASCII responses — which is precisely the kind of interface an LLM-based agent is good at driving, as long as it has a tool that exposes the right verbs instead of a blank TCP connection.
Handing an agent a raw socket and the SCPI command reference is possible, but it means re-deriving the same footguns every time: the STEMlab’s SCPI server is disabled by default, waveform parameters do not take effect until you re-trigger the generator, and an acquisition is not valid until both the trigger and the buffer-fill flags come back true. I already knew all of that from the Goertzel project. Instead of making the agent rediscover it turn after turn, I packaged it once into an MCP server. The result is a standard stdio MCP server with nothing Claude-specific in it, so any MCP-capable client — Claude Code, Claude Desktop, GitHub Copilot’s agent mode — gets connect, generator_set, acquire and friends as typed tools instead of a pile of rp.write('SOUR1:TR:INT') calls to remember.
The other half of the picture is biquad2rtl, an MCP I had already built from earlier biquad-design work: give it a filter type, corner frequency, sample rate and Q, and it characterizes the biquad and emits synthesizable RTL in whatever fixed-point format you ask for. With both MCPs registered, an agent can design the filter, generate the RTL, and then go test it on real hardware — end to end, without me typing a single SCPI command or biquad coefficient by hand.
The redpitaya MCP server
The server lives in redpitaya_projects/mcp_server and is a thin FastMCP wrapper around a pyvisa-based SCPI client, talking to the same TCP port 5000 used in the Goertzel article. It exposes eight tools: connect/disconnect to open and close the session, reset to clear generator and acquisition state, generator_set and generator_set_arbitrary to drive OUT1/OUT2 with a standard or a custom waveform, generator_output to toggle an output without touching its configuration, set_sample_rate to pick the acquisition decimation, and acquire to arm the scope, wait for the trigger, and read the samples back in volts together with the sample rate actually used.
I want to mention that I didn’t write the MCP server, instead I give to the agent my last post and also the reference manual from Red Pitaya, then I tested the server and after some iterations with the number of samples and the output frequency, it was ready to be used.
The two tools that matter most are the ones that hide the firmware quirks. generator_set always re-triggers the generator internally (SOUR<n>:TR:INT) after applying a new waveform, because on this firmware a parameter change alone does not restart generation — exactly the gotcha I ran into by hand in the Goertzel project. And acquire polls both ACQ:TRig:STAT? and ACQ:TRig:FILL? before reading the buffer, because reading too early returns a half-filled, meaningless trace. Baking both into the tool means the agent never has to reason about them (saving tokens); it just calls acquire(channel=1, trigger_source="NOW", decimation=64) and gets back real samples.
Installing it for Claude Code is a one-liner, ./install.sh, which just shells out to claude mcp add:
~/workspace/01_Projects/Git_public/redpitaya_projects/mcp_server$ source install.sh
==> Ensuring the Python virtual environment exists (make venv)
make: Entering directory '/home/pablo/workspace/01_Projects/Git_public/redpitaya_projects/mcp_server'
make: Nothing to be done for 'venv'.
make: Leaving directory '/home/pablo/workspace/01_Projects/Git_public/redpitaya_projects/mcp_server'
==> Registering the redpitaya MCP server (scope: user)
Added stdio MCP server redpitaya with command: /home/pablo/workspace/01_Projects/Git_public/redpitaya_projects/mcp_server/.venv/bin/python /home/pablo/workspace/01_Projects/Git_public/redpitaya_projects/mcp_server/mcp/mcp_server.py to user config
File modified: /home/pablo/.claude.json
==> Done. Verify with: claude mcp list
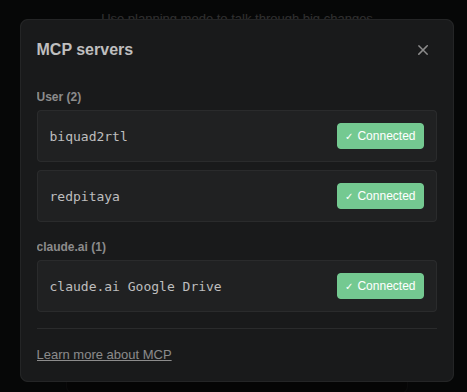
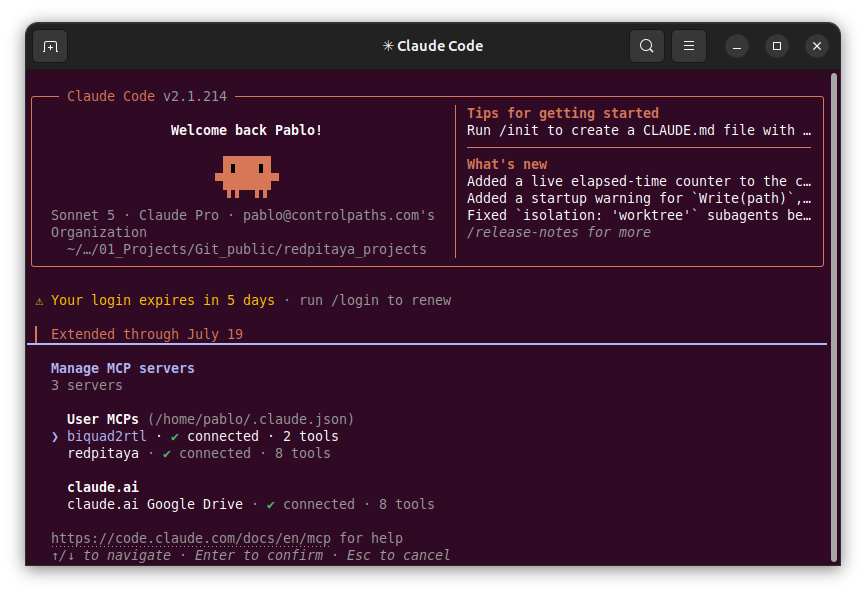
Once registered at user scope it is available from any project, not just this one, which is what let me pair it with biquad2rtl in the same session. /mcp inside Claude Code confirms both are connected before I ask the agent to do anything:
The test bench: ADC, biquad filter, and DAC
The demo I built around these two MCPs is deliberately small: a 10kHz, Q5 bandpass filter running on a Digilent USB104 A7, fed and monitored entirely through the Red Pitaya. My laptop stays light — VS Code with Claude Code, openFPGAloader to flash the Artix-7, an SSH link to a workstation that actually runs Vivado, and the redpitaya MCP to talk to the STEMlab. The STEMlab generates the test tone on OUT2 and reads the filtered output back on IN1. The USB104 A7 carries an ADC122S101 (TI, 12-bit, SPI) on a PMOD and a Zmod DAC1411 on the SYZYGY port.
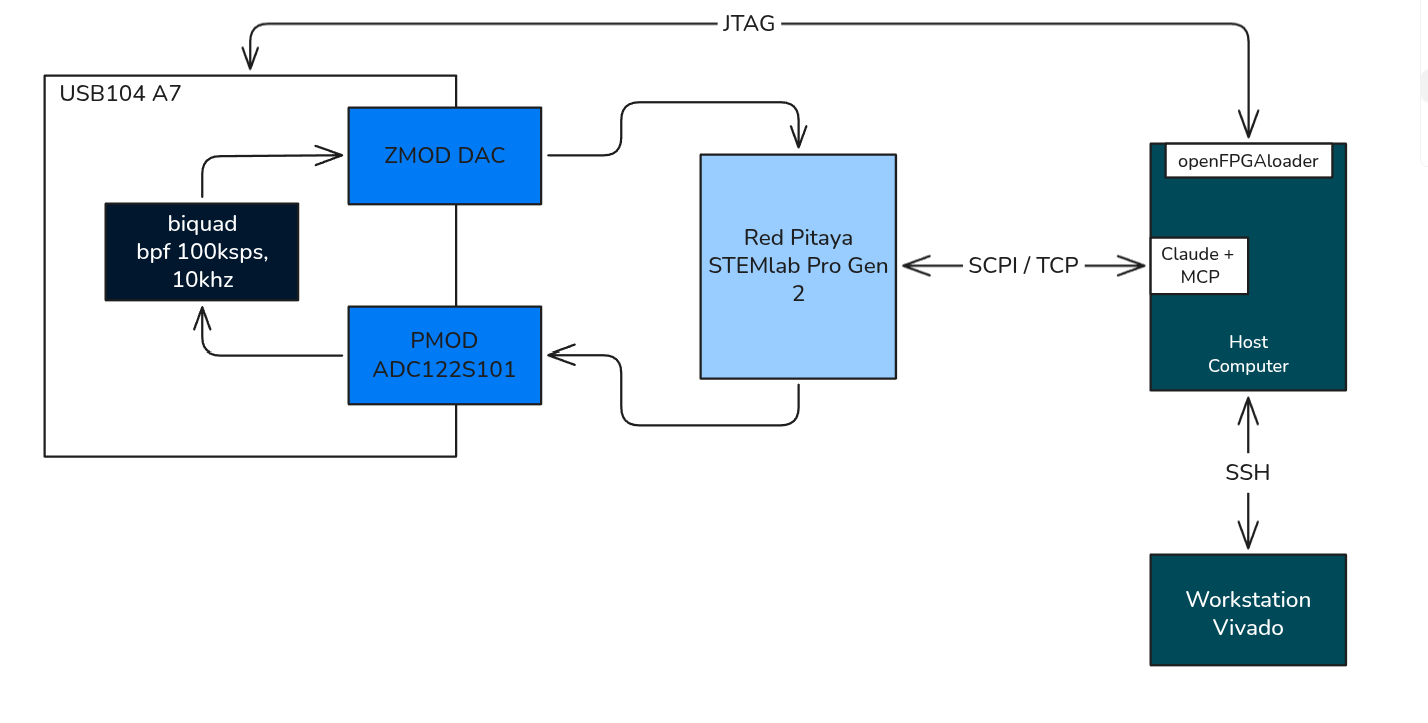
The steps, in order, were: implement an ADC122S101 driver (I did not have one yet), generate the biquad with the biquad2rtl MCP, wire it together with the previously-written Zmod DAC module from my rtl_modules bank, push the sources to a remote build server and get a bitstream back, flash the FPGA with openFPGAloader, and finally drive the STEMlab to generate tones and read the filtered output back. Everything from the second step onward is something the agent could execute directly through the two MCP servers; only the RTL authoring and the hardware bring-up needed me at the keyboard.
Building the RTL
adc122s101.v is a straightforward SPI FSM. The ADC122S101 shifts out a 16-bit frame per conversion — 4 leading zero bits plus a 12-bit unipolar result, MSB first — and alternates internally between channel 0 and channel 1 on every conversion, starting with channel 0 after reset. The driver mirrors that alternation with a single ch_sel bit rather than addressing a channel explicitly, since the device gives you no choice in the matter:
ST_DONE: begin
  adc_cs <= 1'b1;
  if (ch_sel) begin
    ch1_data <= shift_reg[11:0];
    ch1_valid <= 1'b1;
  end
  else begin
    ch0_data <= shift_reg[11:0];
    ch0_valid <= 1'b1;
  end
  ch_sel <= !ch_sel;
  spi_state <= ST_IDLE;
end
With prescaler_sck = 5 and conv_period = 500 at the board’s 100MHz clock, that works out to a 10MHz SPI clock and 100kSPS per channel (200kSPS total, split alternately between the two) — the ADC122S101’s rated maximum.
The filter itself I did not derive by hand. I asked the agent to generate a 10kHz, Q5 bandpass biquad at 100kSPS through the biquad2rtl MCP, in Q20 fixed point (32-bit words, 20 fractional bits), and it came back with biquad_bpf10k_q5.v: coefficients b = [0.0555154, 0, -0.0555154], a = [1, -1.52821, 0.888969] already encoded as Q20 localparams. Direct Form I, one multiply-accumulate per coefficient, no surprises — the kind of module that is genuinely faster to generate than to type out and re-check by hand.
localparam signed [data_width-1:0] coeff_b0 = 32'sd58212;  /* b0 = 0.0555154 in Q20 */
localparam signed [data_width-1:0] coeff_b1 = 32'sd0;      /* b1 = 0 in Q20 */
localparam signed [data_width-1:0] coeff_b2 = -32'sd58212; /* b2 = -0.0555154 in Q20 */
localparam signed [data_width-1:0] coeff_a1 = -32'sd1602442; /* a1 = -1.52821 in Q20 */
localparam signed [data_width-1:0] coeff_a2 = 32'sd932152;   /* a2 = 0.888969 in Q20 */
The top level instantiates two copies of the biquad through a generate block, one per ADC channel, subtracts the ADC’s 2048 mid-code before promoting the sample to Q20, and rescales the filter output back down to the DAC’s 14-bit signed code with saturation. zmod_dac itself is pulled in unmodified from my reusable bank, instantiated with arch = "7series" for the Artix-7’s ODDR primitives; since it has no internal sample buffer and forwards s_axis_tdata on every aclk edge, running the whole design at the board’s 100MHz gives a 1000x oversampled zero-order hold at the DAC’s DDR clock — comfortably inside the AD9717’s range, and one less clock domain to manage.
Building and flashing remotely
My laptop does not have Vivado installed, so I rely on a script that pushes the sources to a workstation over rsync, runs a headless synthesis-implementation-bitstream build there with build_bitstream.tcl, and pulls the resulting .bit back:
rsync -avz --delete \
  --exclude '.git/' --exclude 'project/' --exclude 'ip/*' \
  --exclude 'sim/*.vcd' --exclude 'sim/*.wdb' --exclude '.Xil/' --exclude 'output/' \
  "${LOCAL_ROOT}/" "${REMOTE_HOST}:${REMOTE_ROOT}/"

ssh "$REMOTE_HOST" "cd ${REMOTE_ROOT} && ${REMOTE_VIVADO} -mode batch -source scripts/build_bitstream.tcl"

scp "${REMOTE_HOST}:${REMOTE_ROOT}/project/${PROJECT_NAME}.runs/impl_1/${TOP}.bit" "$OUTPUT_DIR/"
This script is not itself an MCP tool — it is a plain shell script I asked the agent to write and then run over SSH, which turned out to be a perfectly good division of labor: the agent does not need a purpose-built tool for every step, only for the ones with enough hidden state (like the SCPI quirks above) that re-deriving them by hand each time would be wasteful. Once the bitstream lands in output/, openFPGAloader -c digilent flashes the USB104 A7 over JTAG (0403:6010, the board’s onboard FT2232) directly from the laptop, no Vivado required locally.
Bringing-up the setup
Once everything is connected, the STEMlab generates a 10kHz test tone on OUT2, which feeds the ADC on the USB104 A7. The biquad filter processes the signal, and the DAC output is monitored back on the STEMlab’s IN1. The agent orchestrates this setup completely, from the creation of the top module, the implementation in the remote host, and the verification of the application using the STEMlab through the redpitaya MCP.
In the first 3 or 4 tries, some hardware adjustments was needed to fix some issues in the ADC connection to the PMOD, but after that the agent was able of generating the signal and verifying that the output was as expected.
Conclusions
We are living a moment very nice with AI, it is like a child learning to walk: it started solving easy questions, then started to write code, and now it is able to orchestrate a complete verification bench with, for example, a Red Pitaya STEMlab Pro Gen 2 and a Digilent USB104 A7. The agent was able to generate the biquad filter, build the RTL, flash the FPGA, and verify the output without any human intervention after the initial setup.
Someone could argue that there is no need of an AI to do this, and I agree, I could write all the code and tests and run it by myself, but AI is a tool that we need to use if we want to be good engineers, espeially because if we don’t use it, the good ones will be used.
The next step is to keep all of this inside our organization by using local Ai agents, so we can out IP safe and not depend on external services, and this is someting I will write about in the nexgt season.
The code for the redpitaya MCP server is on GitHub, as well as the biquad2rtl MCP server on GitHub